

v. 2.1 ; 7/15/23
ADDING CONNECTIONS FOR GOFUND USERS
To have an active GOfund account, you need to have at least one active fund connection with the proper role and permissions set.
CONNECTING A FUND RECORD
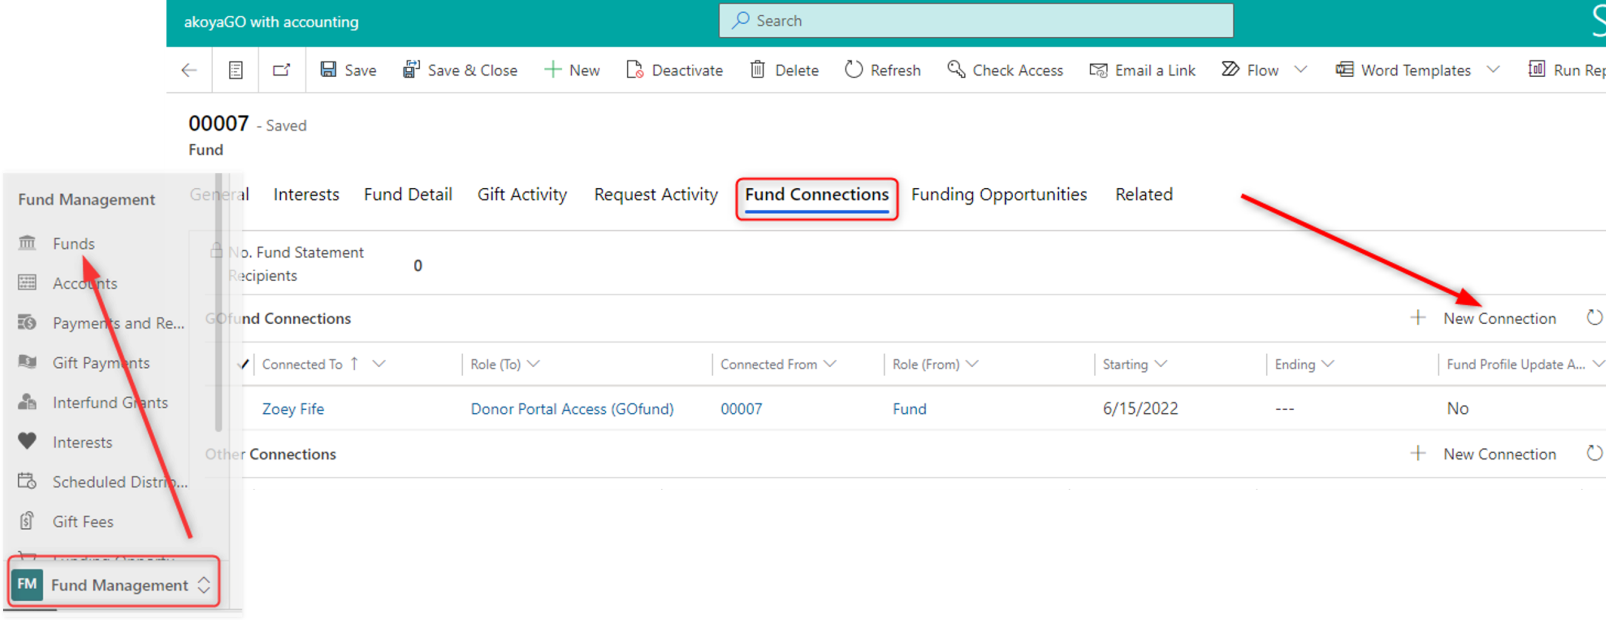
Make sure you are in the Fund Management workplace and the Funds entity. From a chosen Fund, open the Fund Connections tab. Then, click +New Connection.
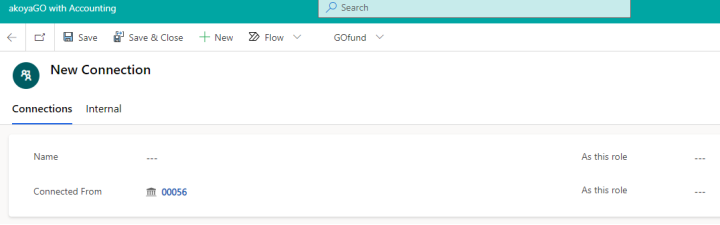
A New Connection form will open with the Fund populated.
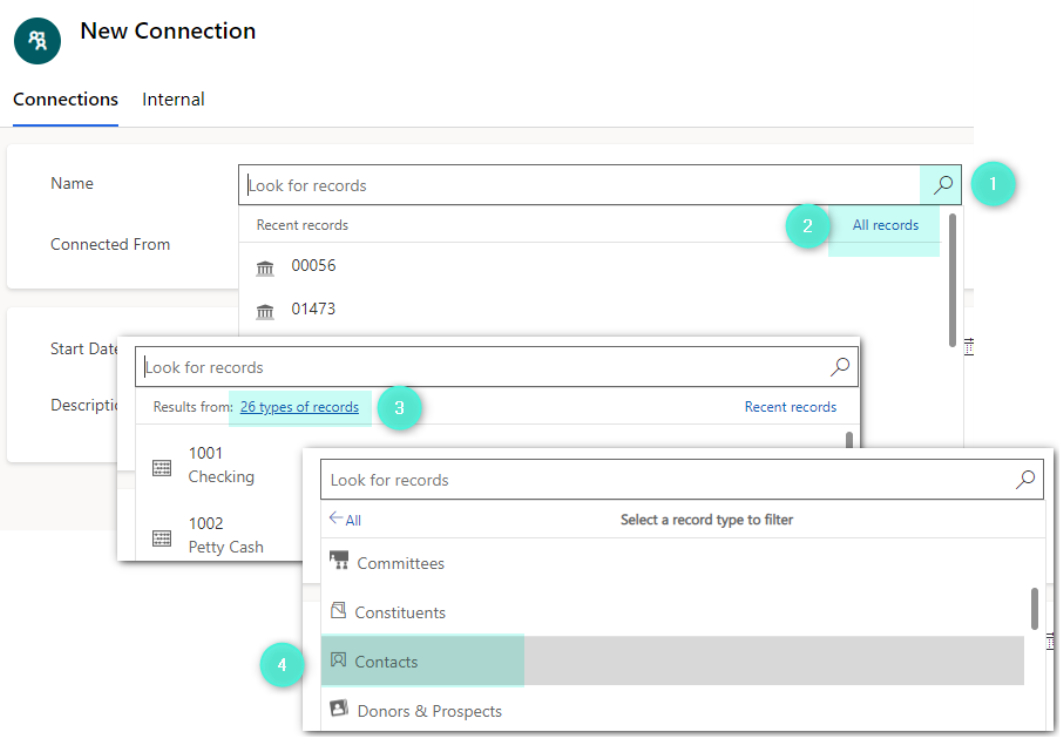
Search for the Contact record to fill in the Name field. Results can be mixed across entities. To ensure you are pulling in the correct contact (and not a user), you can filter the record type to Contact.
From the Name field:
Click on the magnifying glass and select “All Records.” Click on the “Results from ## Record types,” then select Contact. If you select anything other than a Contact record, the system will not allow you to save.
Next, click into the As this role field and select Donor Portal Access (GOfund). The second “As this role” field will auto-fill as Fund.
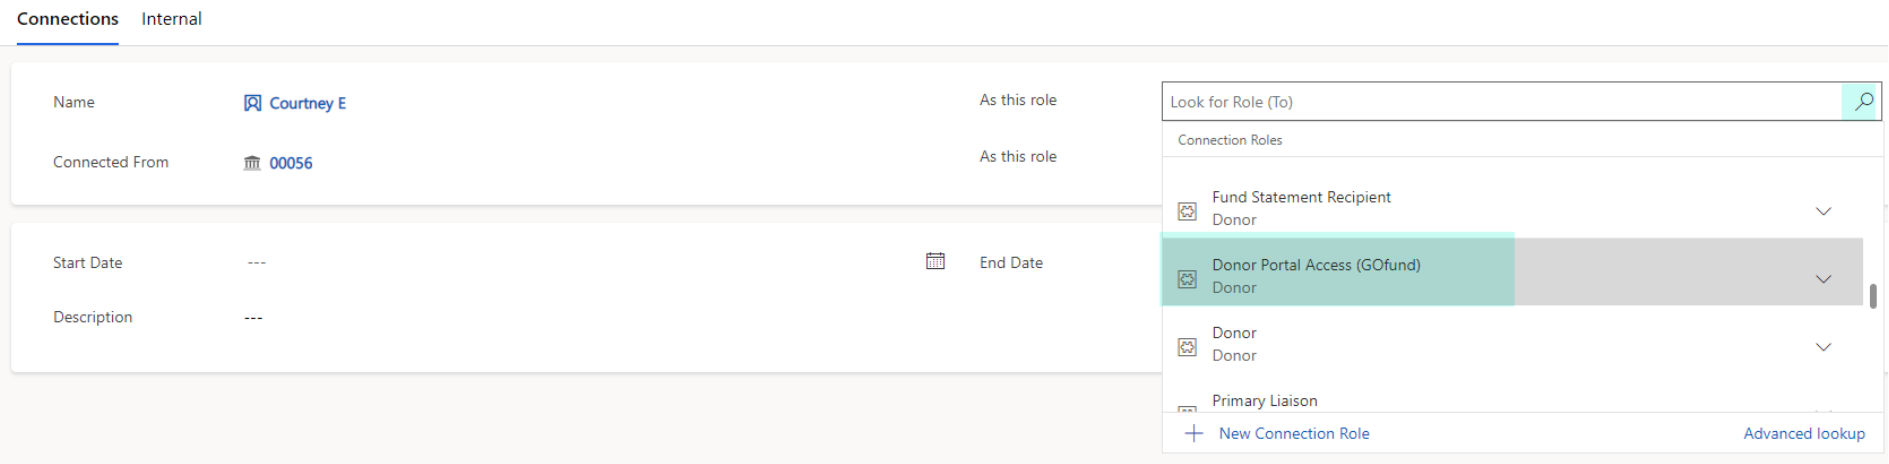
Upon selecting the Donor Portal Access role, a Donor Portal Access subgrid will appear with the role’s permissions sets. Here you can choose the access level for an individual GOfund user.
- Fund Profile Update Access: If Yes, the user will have the ability to edit the information in the Fund Profile.
- Grant Submission Access: If Yes, the user will have the ability to submit grant recommendations.
- View Fund Statement: If Yes, the user will have the ability to view the fund statement and see particulars
- Grant History Access: If Yes, the user will be able to view the Fund’s Grant History in the Fund Summary and in the Grant History from the top menu.
- Gift History Access: If Yes, the user will be able to view the Fund’s Gift History in the Fund Summary and in the Gift History from the top menu.
- Document Access: If Yes, the user will have access to any documents uploaded to that fund and site-wide documents. If No, the user will not have access to document uploaded to that fund, but will still be able to see documents uploaded in GOfund Settings if the Enable Documents setting is set to Yes.
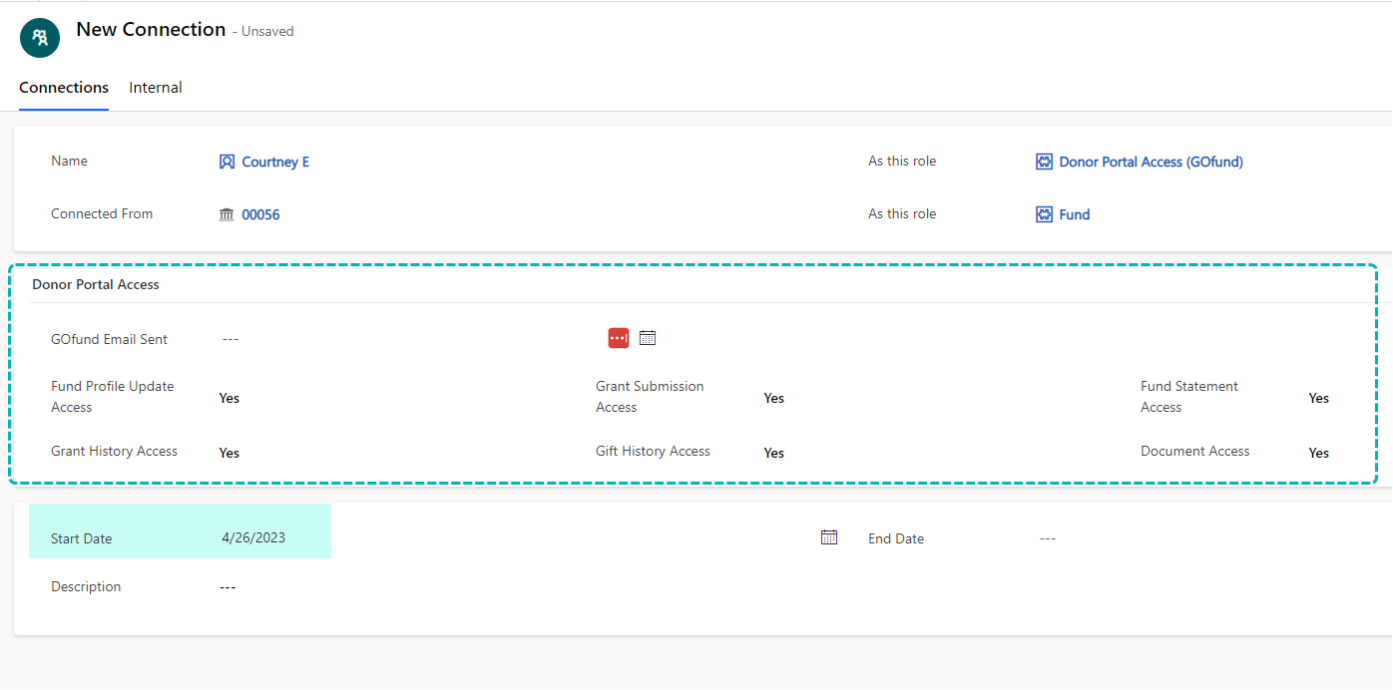
Make sure to fill in a Start Date. Start Date is required before saving a Fund Connection. End Date and Description are not required. You may choose a start date in the future. The GOfund email invite will be sent on the date that you choose in Start Date. When the GOfund invite is sent, the GOfund Email Sent field will populate with the date. When you are satisfied with your Fund Connection, click Save, or Save and close.
Please note: it could take up to twenty minutes to see your funds in GOfund.