

Revised 06/16/2026
This document describes the GOapply user experience and how GOapply Administrators can assist and support GOapply users.
Creating a New Account
Please note: for information on invitation-only Opportunities, please see the GOapply Invitation-Only Opportunities Knowledge Article.
Applicants using GOapply for the first time will need to create an account.
If you have enabled it in your GOapply Settings, users can register as an organization or an individual. For more information on limiting the Allowable Registration Type, please see the GOapply Settings section of the GOapply Administrator Guide.
Organization users are typically non-profits applying for a grant. The user is applying on behalf of an organization.
Individual users are typically scholarship applicants. The user is applying on their own behalf.
Applicants will visit your GOapply URL to register and submit their applications. This URL can be found in your GOapply Settings, accessed through the GOapply area in akoyaGO.

Upon clicking the link, the applicant will be directed to the sign-in page. If they have never signed in before, they will need to click "create a new account."
Create an Individual Account
Applicant selects Individual.

They will enter their information and set a password (minimum 10 characters, maximum 100).
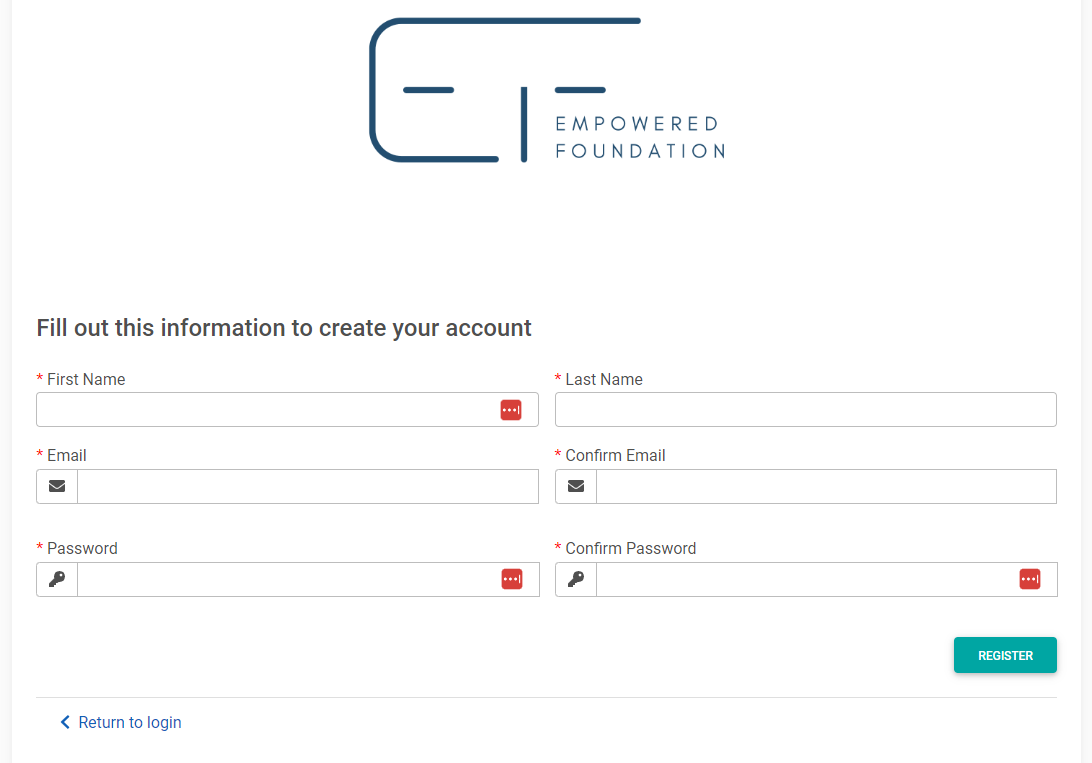
All Individual Users are automatically approved, regardless of the Applicant Approver method set in your GOapply Settings. The user can now sign in.
Register as an Organization
Applicant selects Organization.
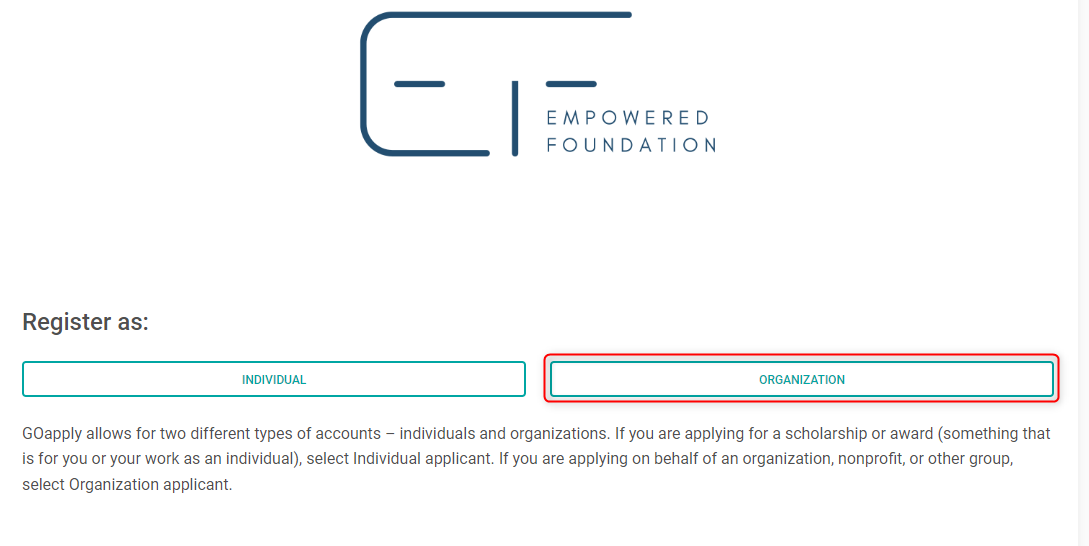
If you have not limited the Registration Charity Search to the United States or Canada (as set in GOapply Settings), the user will be able to select their region. Then they can either search for their organization or manually enter their information by choosing Skip.
When searching, the user will enter their name, EIN/Tax ID (US Organizations), or Business Number (Canadian Organizations), then click Search.
The user will see a list of potential matches. The organizations displayed are determined by:
- Existing Active Constituents in akoyaGO
- US IRS Tax Exempt Organization Search Tool (if US is included in Registration Charity Search, set in GOapply Settings)
- Canada's List of Charities - basic search tool (if Canada is included in Registration Charity Search, set in GOapply Settings)
GOapply registration search will return results for all existing Constituents with the given tax ID or name (if applicable); this includes Parent Constituents of Constituents that share a Tax ID.
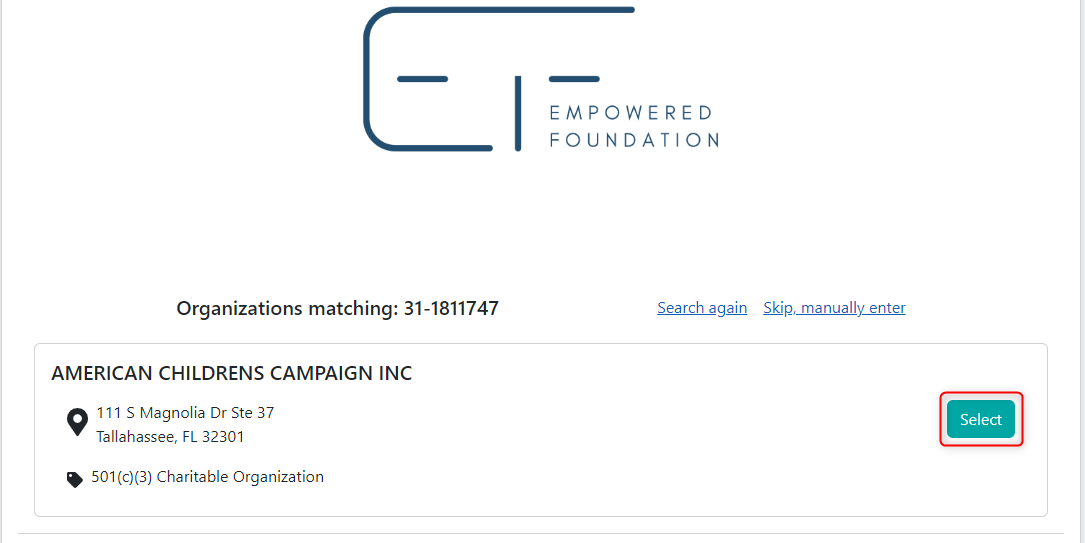
If the tax ID matches more than one organization in akoyaGO, the registrant will see all matching organizations and can choose from the list. Please note they will also see the description, AKA, and department to help them make the right choice.
The user will click Select next to their organization.
User Selects Existing Constituent in akoyaGO
If the user selects an existing Constituent in akoyaGO, that Constituent will be set as the GOapply user's Parent Constituent. A duplicate Constituent will not be created if they choose an existing Constituent.
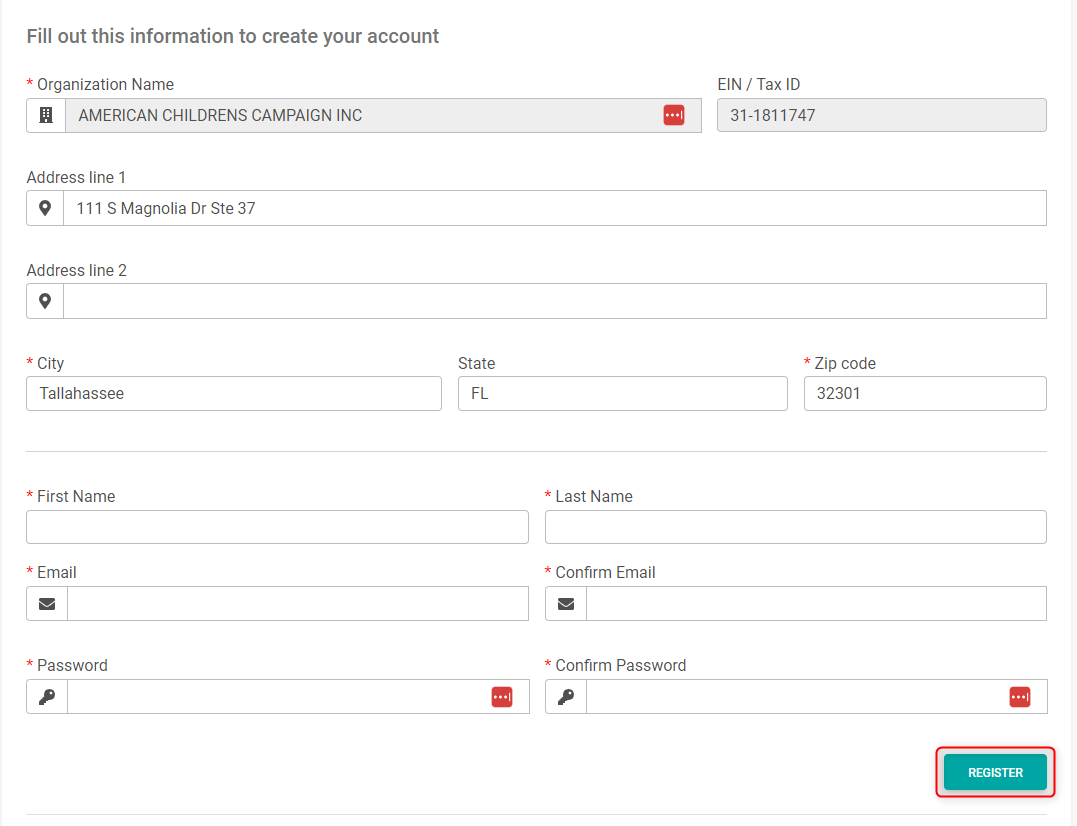
Next, a form will appear with their organization information filled in. If the user chooses an existing constituent in akoyaGO, the Name, Tax ID, and address fields will be locked, as they cannot update existing Constituent information during registration.
At the bottom of the form, the user will enter their information and set a password (10-character minimum, 100-character maximum), and click Register:
User Selects Organization from the United States IRS Tax Exempt Organization Search Tool or Canada's List of Charities
If the user selects an organization from the United States IRS Tax-Exempt Organization Search Tool or Canada's List of Charities, a new Constituent will be created upon registration, unless all fields entered by the registering user exactly match an existing Constituent in akoyaGO.
This is intentional to account for cases where multiple branches, schools, or entities may share the same Tax ID/EIN but require distinct profiles in the system. To help prevent unintended duplicates and keep your data clean, we recommend enabling duplicate detection rules. More information on Duplicate Detection Rules can be found here: Duplicate Detection: Rules & Merging Duplicates
This new constituent will be set as the GOapply user's Parent Constituent.
Next, a form will appear with their organization information filled in. If the user selects an organization from the United States IRS Tax Exempt Organization Search Tool or Canada's List of Charities, the Organization Name and Tax ID fields will be locked.
At the bottom of the form, the user will enter their information, set a password (minimum 10 characters, maximum 100), and click Register.
User Chooses Skip, Manually Enter
If the user chooses Skip or Manually Enter, a new Constituent will be created upon registration unless all fields exactly match those of an existing Constituent in akoyaGO. This new constituent will be set as the GOapply user's Parent Constituent.
This is intentional to account for cases where multiple branches, schools, or entities may share the same Tax ID/EIN but require distinct profiles in the system. To help prevent unintended duplicates and keep your data clean, we recommend enabling duplicate detection rules. More information on Duplicate Detection Rules can be found here: Duplicate Detection: Rules & Merging Duplicates
This new constituent will be set as the GOapply user's Parent Constituent.
Next, a blank form will appear for the user to enter their organization's information. At the bottom of the form, the user will enter their information, set a password (minimum 10 characters, maximum 100), and click Register.
For all three scenarios, a GOapply User record will be created in akoyaGO upon registration. Please note that a Contact record is not created for the GOapply User who registers. Organization Users will be auto-approved or will require approval at this point. This depends on the Applicant Approver field set in GOapply Settings. If approved, the new user can now sign in. For more information on Applicant Approver, please see the GOapply Settings section of the GOapply Administrator Guide.
Navigating GOapply UI
Once logged in to the GOapply UI, users can find draft submissions, past submissions, and open Opportunities (meaning they are not invite-only, published, the first Phase Due Date has not passed, and the Opportunity is open to their user type)
Organization Users will also see an Organization Profile.
If the user is also a Reviewer, they can access GOapply Reviewer. See the GOapply Reviewer Admin Guide for more information.
Dashboards
In Progress: the In Progress Dashboard shows users' phases they have started (or have been advanced to) but have not submitted. This is also where new phases will appear when the foundation gives the user access to them (such as agreements, reports, etc.) By default, the user will see the Phase Due Date, the name of the Opportunity and Phase, and the percentage of the Phase that they have completed. However, the columns shown here are customizable if you wish to make adjustments. For more information, see the System Views section of the GOapply Administrator Guide. Please note any fields related to Request are intentionally not included in this View, as the Request is typically not yet created when the GOapply User begins the first phase in GOapply (meaning these columns would be blank)
There is also a delete button on the far right for users who wish to delete this partially completed phase.
*IMPORTANT - Organization Users will see all In Progress and Submitted Status Tracking records for their organization. This means that if multiple users have registered (and been approved) on behalf of the same organization/Constituent, they will see the same drafts under the In Progress tab. Any Organization User with "Submitter" permission will be able to submit drafts. Organization users can work collaboratively to complete and submit drafts.
Organization Users who have registered on behalf of an organization listed as the "Parent Constituent" for other Constituents in akoyaGO CRM will be able to view In Progress Status Tracking records for all Child Constituents. For more information regarding Parent/Child Constituents, please see the Entering Constituents Knowledge Article.
Please be aware that if a user deletes an item from the In Progress Dashboard, the corresponding Status Tracking Record in akoyaGO CRM will also be deleted. The user will need to start the phase over.
Users can download their draft submission from the In Progress Dashboard by clicking the download icon next to the View button. This will download a copy of the draft with all current answers filled in and display every possible outcome based on those responses, including branching-logic fields.
Submitted: The Submitted Dashboard displays all submitted phases to users. By default, they can see the Phase and Opportunity name, the submission date, the Request number associated with that submission, the Request status, the Grant Amount (if applicable), and the Request Decision Date. However, the columns shown here are customizable if you wish to make adjustments. For more information, see the System Views section of the GOapply Administrator Guide.
*IMPORTANT - Organization Users will see all Submitted Status Tracking records for their organization. This means that if multiple individuals have registered (and been approved) on behalf of the same organization/Constituent, they will see the same past submissions under the Submitted tab.
Organization Users who have registered on behalf of an organization listed as the "Parent Constituent" for other constituents in akoyaGO CRM will be able to view Submitted Status Tracking records for all child constituents. For more information regarding Parent/Child Constituents, please see the Entering Constituents Knowledge Article.
Opportunities: the Opportunities Dashboard shows all Opportunities the user is eligible to apply for (Invite Only = no, Published = yes, Phase 1 Due Date has not passed, and Opportunity Type = matches the GOapply User's Opportunity Type). By clicking the Opportunity, the GOapply User will access the first Phase of the Opportunity (most typically an Eligibility Phase, LOI, or Application). The Opportunities list only checks the requirements listed above.

Organization Profile
In the Organization Profile, users can see and update organization information. If you would like to require approval by an akoyaGO user for suggested updates, please see the Change Requests Knowledge Article.
This form is set by the Organization Profile Form Editor in GOapply Settings. For more information, please see the Organization Profile Form Editor Section - GOapply Administrator Guide.

Please be aware that fields in the Organization Profile that are not read-only are editable by the user; any changes will be applied to the existing Constituent record in akoyaGO.
If enabled in the GOapply settings, users can also see other users in their organization. When this setting is enabled, users can deactivate other users in their organization, blocking them from logging in to GOapply.
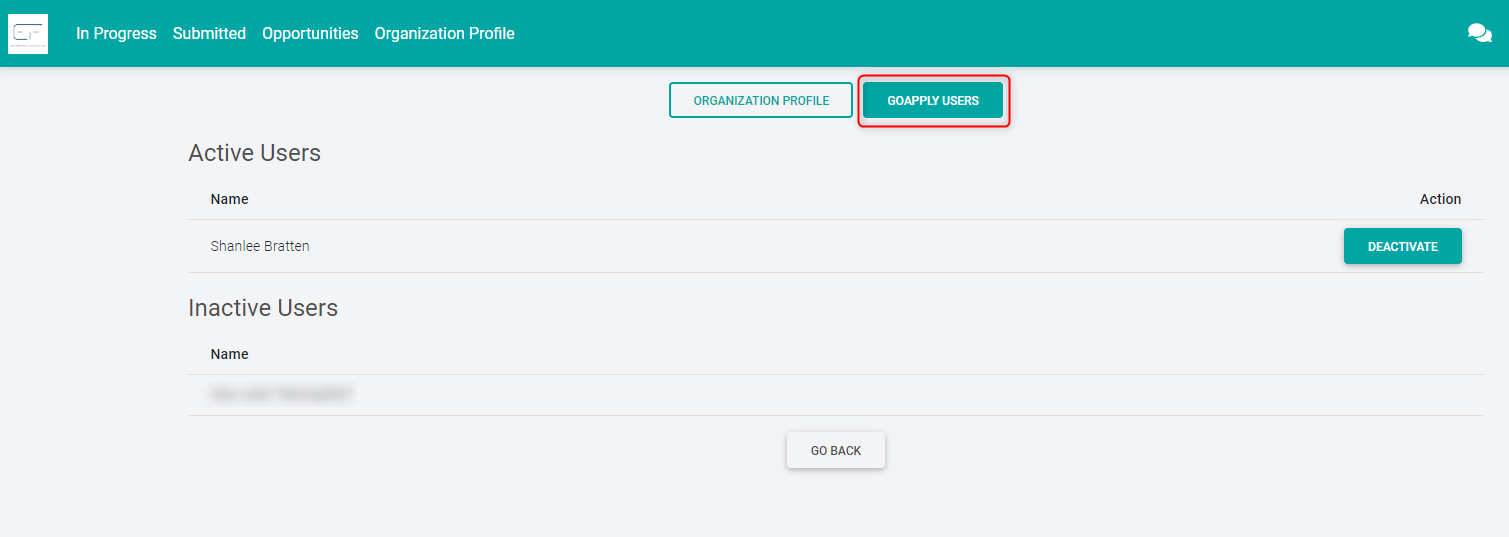
The GO BACK button will take the user to their In Progress Dashboard.
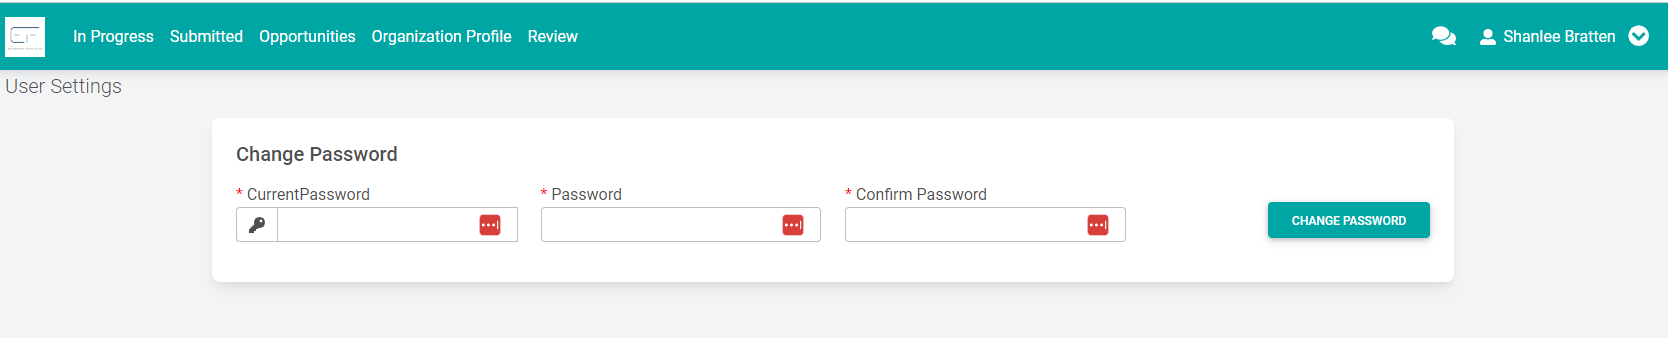
User Settings
In the top-right corner of the screen, users can tap the carrot next to their name to open their user settings.

This is where users can change their passwords. Password changes can also be done via the "forgot password" link on the login screen.
Applying
To begin the first phase of an Opportunity, users should click View on the Opportunities Dashboard.

Users will be taken to the “home” page, where they will find: 1. the fiscal year, 2. the phase due date/time, and 3. the phase contact.
They will see a Print Blank button (if the setting has been enabled on the Opportunity in akoyaGO) and an Apply button. Please note that the Apply button can be customized via GOapply settings, so it may be labeled differently, but will still be found here.
Print Blank allows the user to download a blank PDF of the phase, including all logic branching fields. However, any fields that are truly hidden from applicants (Is visible = OFF) will not appear on the blank PDF.
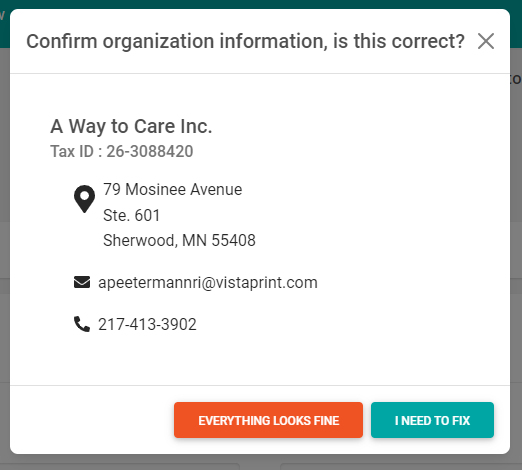
Once they click Apply, Organization Users will see a message about their organization profile. This allows them to edit any details before beginning the Phase. To edit, click I NEED TO FIX, or to continue to the Phase, click EVERYTHING LOOKS FINE.
Next, the user will fill in the Phase. At the bottom of each page, they will see a Save Draft button. When they are ready to submit, they will click Submit on the last page.

Confirmation Email
After each phase is submitted, the submitter will receive an email confirming the submission. This email is determined to be an Email Template titled GOapply Submission Confirmation to Applicant.
Later Phases
When/if an akoyaGO user advances the GOapply user to any subsequent phase(s), the new phase will appear in their In Progress Dashboard. For example, there may be an agreement or report(s) to complete for users who have been awarded a grant or scholarship. Or if the first phase was an LOI or eligibility phase, the user may have been advanced to the full application.
GOapply will not notify GOapply users that a subsequent phase is available. Notification can be done via a custom workflow as part of your grant/scholarship notification process, or manually to GOapply users. GOapply users will complete and submit subsequent phases using the same steps described above.