

Navigating to Views in PowerApps
To access Power Apps, click the waffle in the top corner of akoyaGO Power Apps, or open a new window in your browser and go to make.powerapps.com.
Before proceeding, ensure you are in the correct environment. In the upper right-hand area of the screen:
- Click on the Environment name. A list of all associated environments will appear.
- Choose the “Production” environment, not the Default
You can be certain of which option to select by hovering your cursor over the title. The correct selection will show the Environment Type as “Production.”
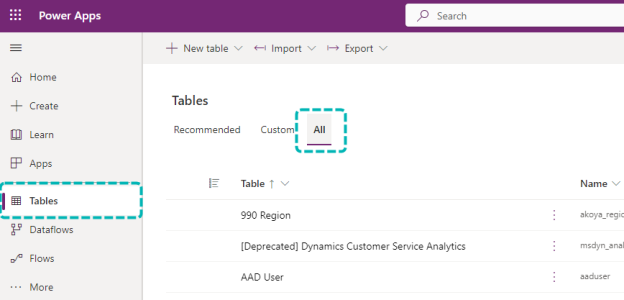
Searching for Tables
From the Home page:
- Select Tables from the left-hand side menu
- Click on “All” Tables
- Scroll until the necessary table is found -or- Use the upper-right Search option for quicker results. The new view will be created within this table.

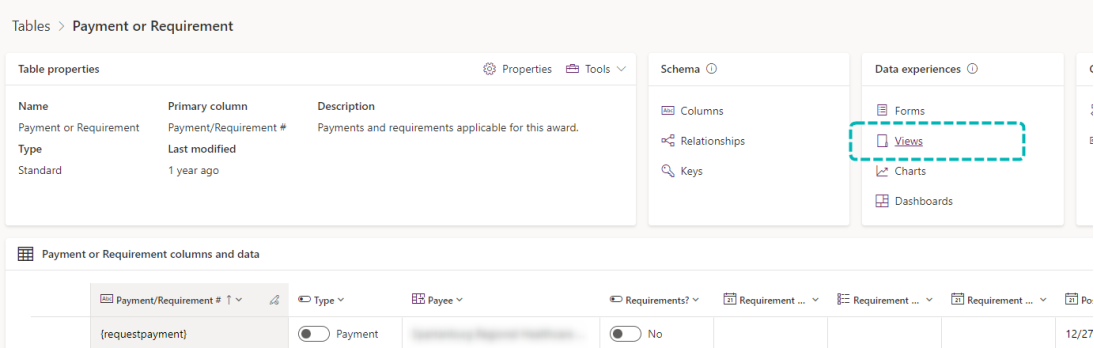
Once in the menu of the selected Table, click on the Views link shown below.
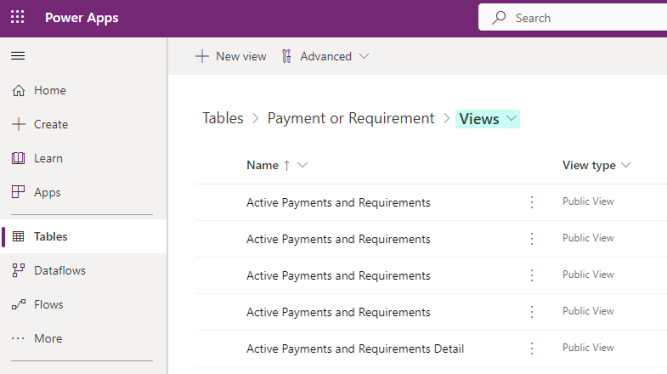
Creating a New System View from an Existing System View
You can create a new System View from an existing System View or from scratch. If you would like to use an existing System View, select the view you would like to use:
For steps on editing System Views, reference the Editing System Views Knowledge Article. Once you have created your new System View by editing the columns and/or filters, choose Save As and give it a new name.
Creating a New System View (Not from an Existing System View)
To create a new System View not from an existing view, choose +New view from the top navigation bar:
Give your System View a Name. You can also include a Description if you would like.
Create your new System View by adding columns and filters. Save and publish.
Adding Your System View in the App Designer
After you have saved and published a new System View, the final step is to add it to the App. From Power Apps, choose Apps from the side navigation bar. Then choose All to see all Apps. Select the App that your organization uses, either akoyaGO or akoyaGO with Accounting.
From this screen, choose the entity (also known as a table) under which you built your System View. The System Views for this entity will be listed in the sidebar. Scroll down to the "Not in this app" section to find your new System View.
If the Not in this App section isn't visible but the 'Include all views in this app' toggle is set to On, you can skip the last steps, as your new view is already added to the app.
Click the 3 dots and choose + Add. This will add your new view to the App. Lastly, click Publish.