

Last Updated 02/02/2026
GOdonate also works in conjunction with Stripe, an online payment processing service.
Please note: It is the foundation’s responsibility to establish and administer its Stripe account. Go to https://dashboard.stripe.com/register to start the process.
Stripe offers discounts to non-profit organizations. You can find more information here: https://support.stripe.com/questions/fee-discount-for-nonprofit-organizations
For more information on Stripe account setup, please see the Knowledge Article Stripe Account Setup.
GOdonate Settings will need your Stripe API keys. For instructions on finding your Stripe Keys, please see the "Obtaining Stripe API Keys for GOdonate " guide on GOsupport.
GOdonate in CRM
Before launching GOdonate to users, review all CRM components that support GOdonate.
On each Fund record, there is a section called GOdonate. This section contains an Enabled field and a Title Slug field.

The GOdonate Enabled field will default to No. It is a dropdown Yes/No field.
- If Yes, the fund will be available to accept donations in GOdonate.
- If No, the fund will be hidden from GOdonate.
- If the field is null (blank), the fund will be hidden from GOdonate.
Title Slug: A title slug is a great tool to use when you want a clean, easy-to-remember URL. A slug is the part of a URL that identifies a particular page on a website in an easy-to-read form. The slug replaces the string of letters and numbers known as a GUID. The title slug will appear in the url after /fund/.
To create a title slug, type the words you want to use separated by hyphens. For example, “bill-berrier-fund”.
Here is a URL without a title slug:

And here is a URL with a title slug:

Public Fund Image
GOdonate will use, if applicable, the public fund image for the fund’s card and details page in GOdonate.
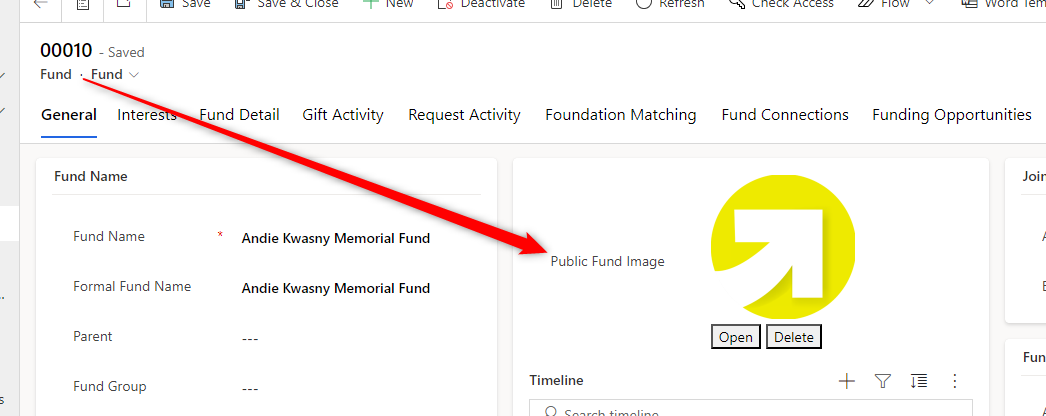
If the Public Fund Image is blank, the fund image will default to the image you select as the fund default image in your GOdonate settings.
Public Fund Image, when displayed in GOdonate, the image has a max-width 640px and max-height 480px.
You can access the Interests table from the Tools area in akoyaGO. Interests can be used to categorize funds.
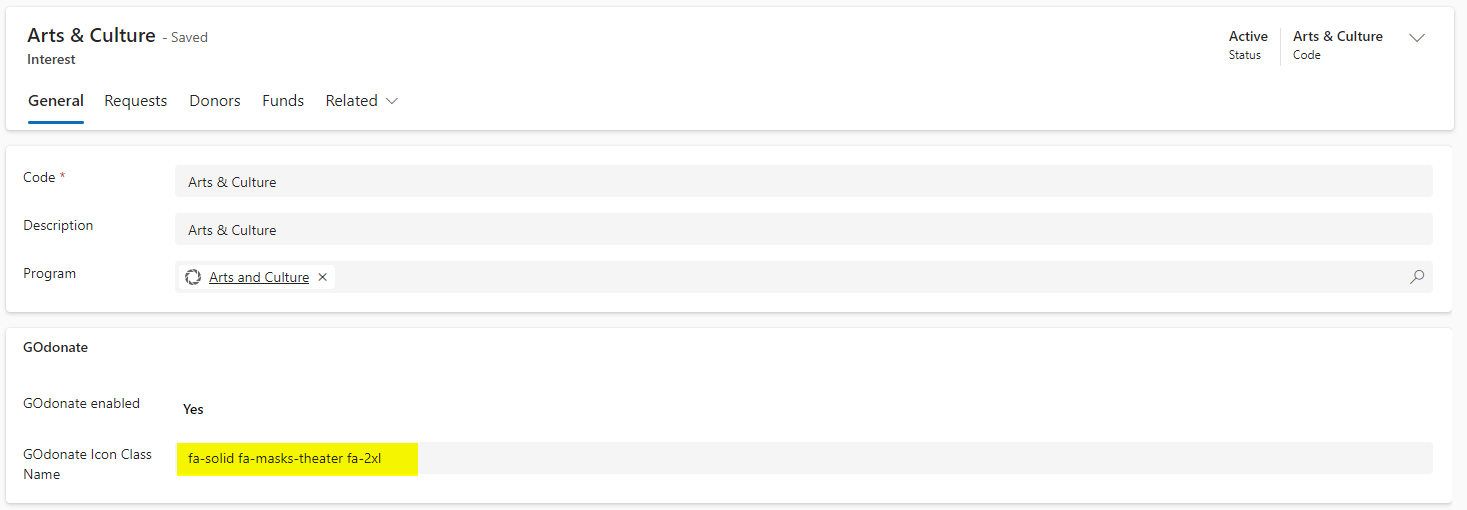
There are several GOdonate settings on an Interest record.
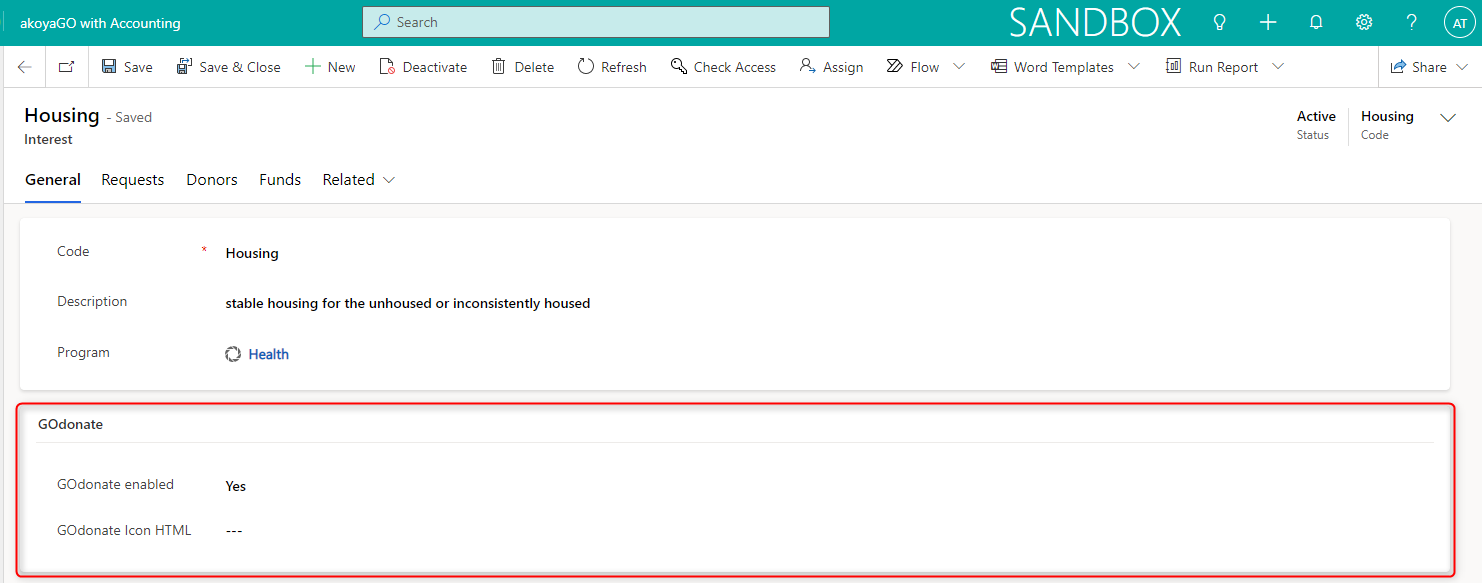
- GOdonate enabled: Yes or No. If Yes, the interest will be listed on your GOdonate site. Upon installation, it will default to Null. If set to Yes, this Interest will appear as a category in GOdonate.
- GOdonate Icon Class Name: this field utilizes HTML code from https://fontawesome.com/icons/
Simply search for an icon:
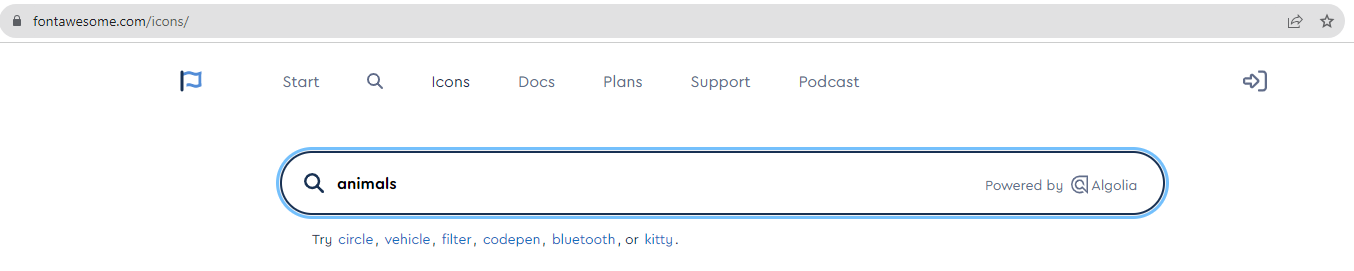
Select the one you like from the list,

The image cards with Pro on them will not work unless your organization is subscribed to a Pro account with Font Awesome.
Note the options to edit the icon, especially the size option. We recommend you use the 2XL option.
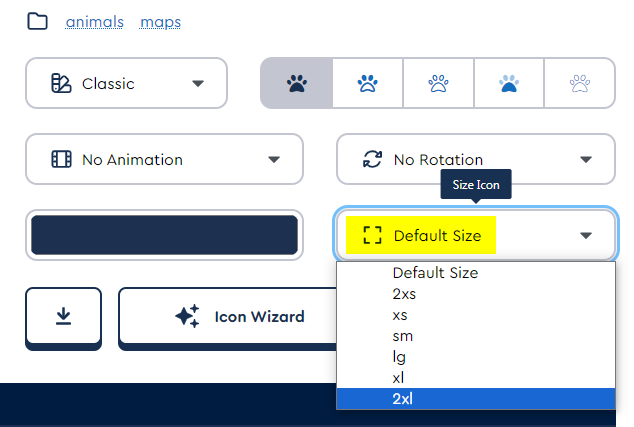
copy the HTML portion between the quotation marks and paste into the Icon Class Name field.
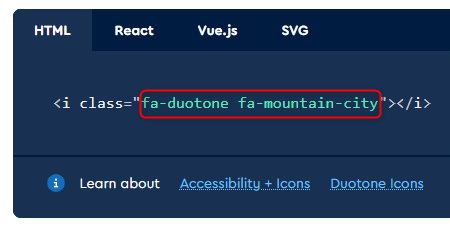
It will look something like this:
On a contact record, there is a Donor Related section on the Summary tab.
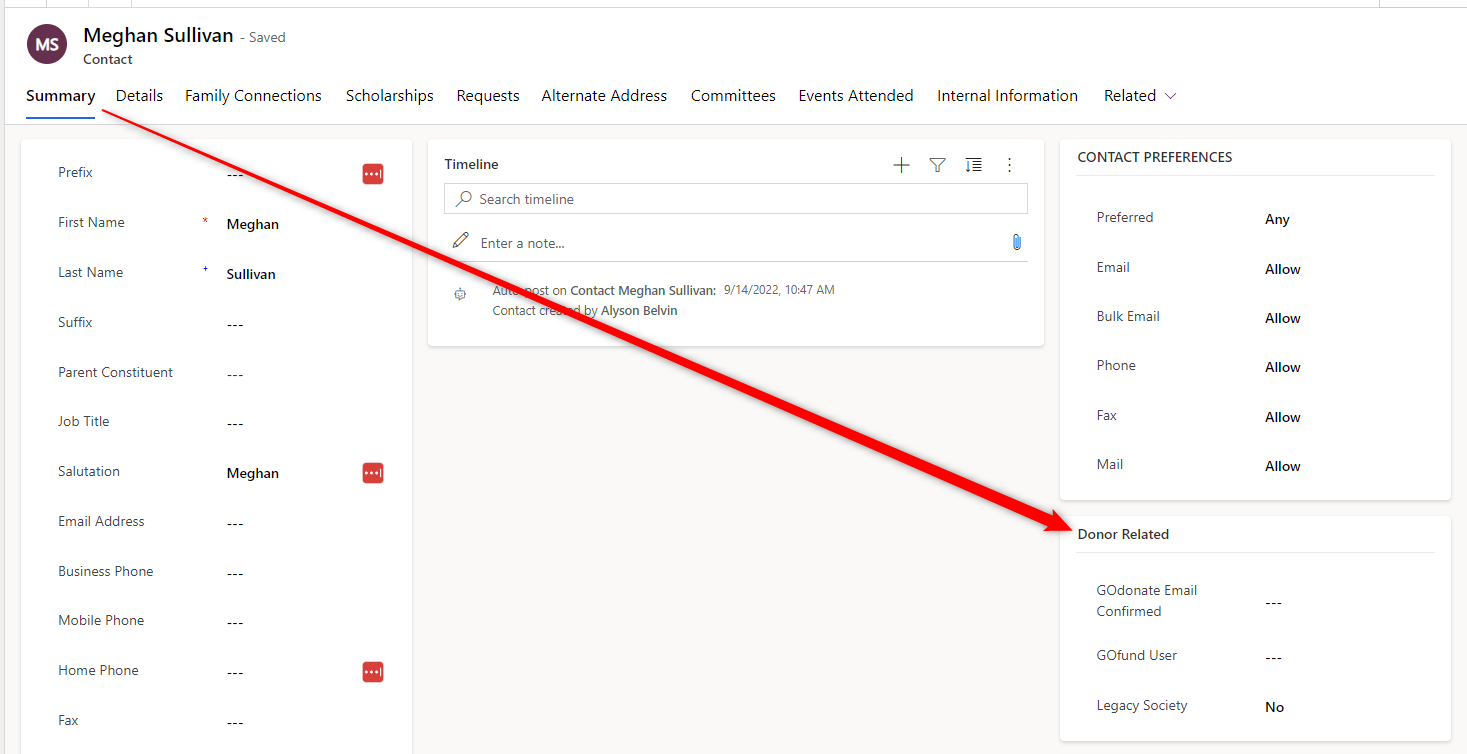
After a user registers and verifies their email, the GOdonate Email Confirmed field will update to Yes.
If a user is having trouble logging in, make sure the GOdonate Email Confirmed field is set to Yes.
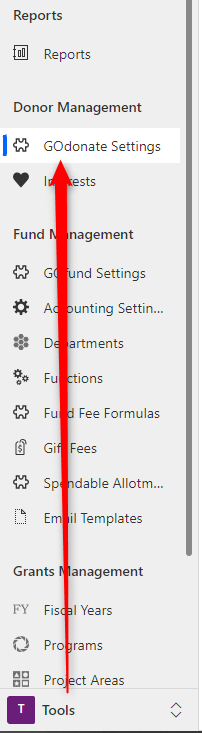
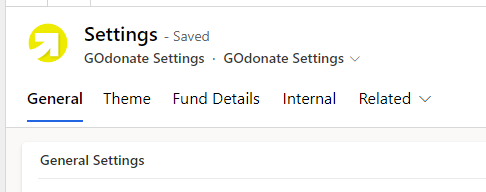
The GOdonate Settings table is available in the Tools area of your akoyaGO CRM. GOdonate Settings includes General, Theme, and Fund Detail tabs. This is where you control how your GOdonate site looks and functions.
GOdonate Settings: General Tab
In the General tab you will find three sections – General Settings, Stripe Settings, and Customized Text.
General Settings
Allow Sign Ins: if off, the registration and sign-in links will be removed from the home page. If yes, users can register or sign in.
Foundation User: this must be a User, not a Contact; the user listed here will be the person listed in the From line in GOdonate emails. Please ensure the user you choose is set up to send emails from akoyaGO.
Enable Google ReCAPTCHA: Google ReCAPTCHA enables web hosts to distinguish between human and automated access to websites. If on, this feature will run silently in the background. Users will not notice this process.
GOdonate URL: this will be filled in by your GOdonate project manager upon implementation. This field will lock once it contains data.
Enable Designated Giving: when ON, users will see an additional field in the donation form where they can choose between a general unrestricted donation or a designated purpose. If the Designated purpose is checked, an additional text box will appear where they can type their intention for the donation.
Minimum Donation Amount: Optional. Set the minimum amount that users will be able to give.
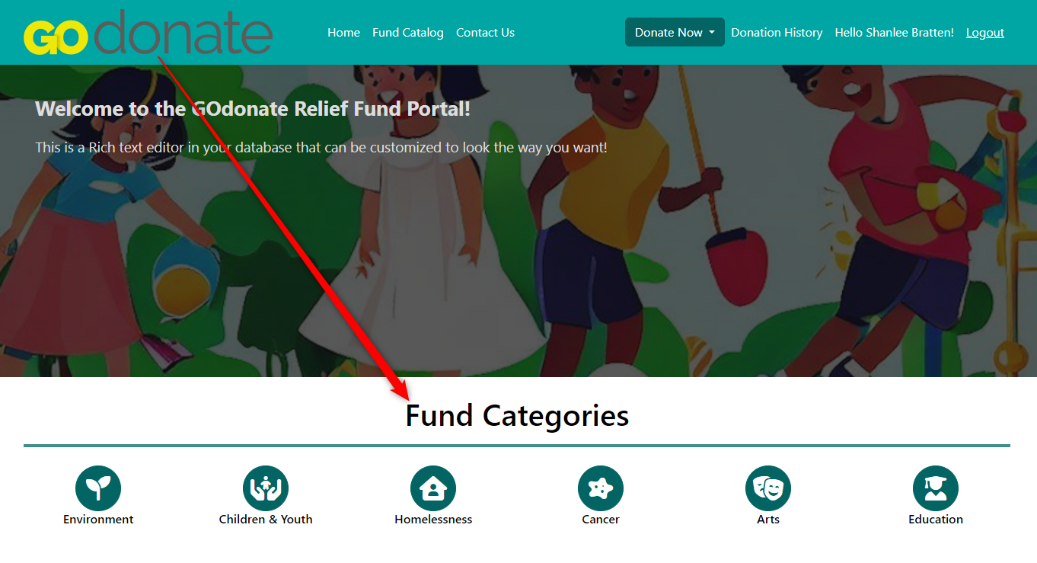
Utilize Interests for Fund Categories: if Yes, Interests in your CRM will appear as categories in your GOdonate site. Categories will be listed alphabetically based on the Interest Code field. If No, the Categories area of the GOdonate home page will disappear, and users will also not be able to search by Interest.
Maximum Donation Amount: Optional. Set the maximum amount that users will be able to give.
Enable Recurring Donations: When Yes, users will have the option to create recurring donations. For more information, see the GOdonate - Recurring Donations Knowledge Article.
Additional Donation Percentage For Fees and Donor-Covered Fee Text: These fields apply to donors who can cover the credit card processing fee. For more information, please see the knowledge article called GOdonate - Donor Covers the Fee.
Disable Automated Confirmation Email: When enabled, suppresses the automated one-time donation confirmation email sent to donors after a successful GOdonate transaction. Does not affect recurring gift confirmation emails.
Stripe Settings

- Stripe Publishable Key, Stripe Secret Key: These are the values from your Stripe account. Please see the Obtaining Stripe API Keys for GOdonate video on GOsupport for instructions on how to find your Stripe API keys.
Customized Text
All of the following fields are optional; this is where you can add messaging to your GOdonate site.
Home Page Text: Rich text editor, the content in this field will appear at the top of your GOdonate home page, as shown below. Please note that images are not supported in rich text fields. Best practice is to type the text directly in this field. When copying/pasting from other apps, original formatting cannot be guaranteed.

Home Page Text Background: This field controls the opacity of the home page hero image.
Fund Catalog Page Name: If you would like to relabel the Fund Catalog page so that it appears as something different on your GOdonate site, input that label here. If left blank, the label will default to Fund Catalog.
Fund Catalog Sort: This setting allows you to choose if the fund catalog is sorted alphabetically by Fund Name or Formal Fund Name.
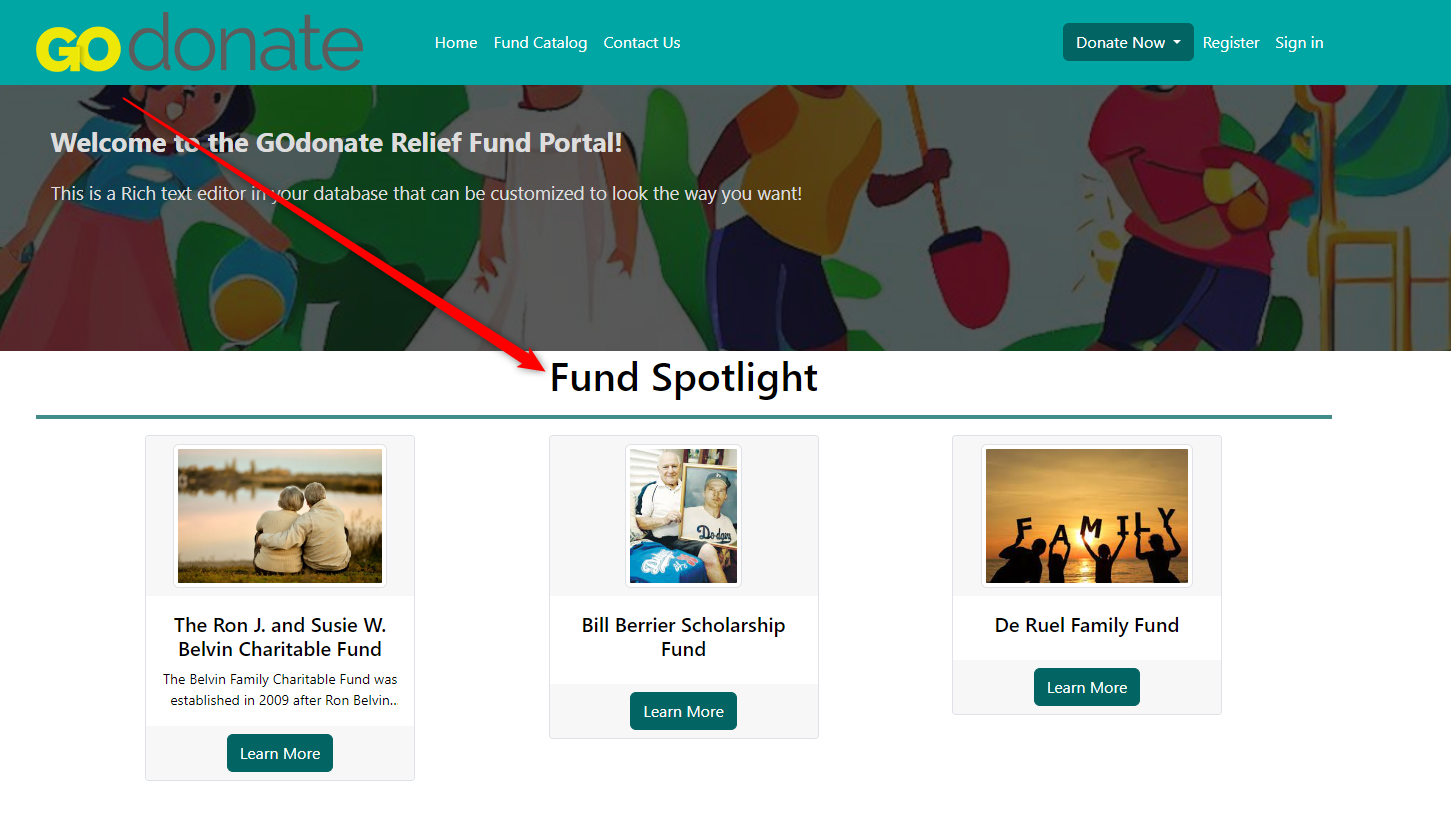
Home Page Fund Spotlight Label: If you would like the Fund Spotlight section of your home page to be labeled something different, input that here. If left blank, the label will default to Fund Spotlight.
Home Page Fund Categories Label: If you would like the Fund Categories label to appear as something different, input that here. If left blank, the label will be Fund Categories.
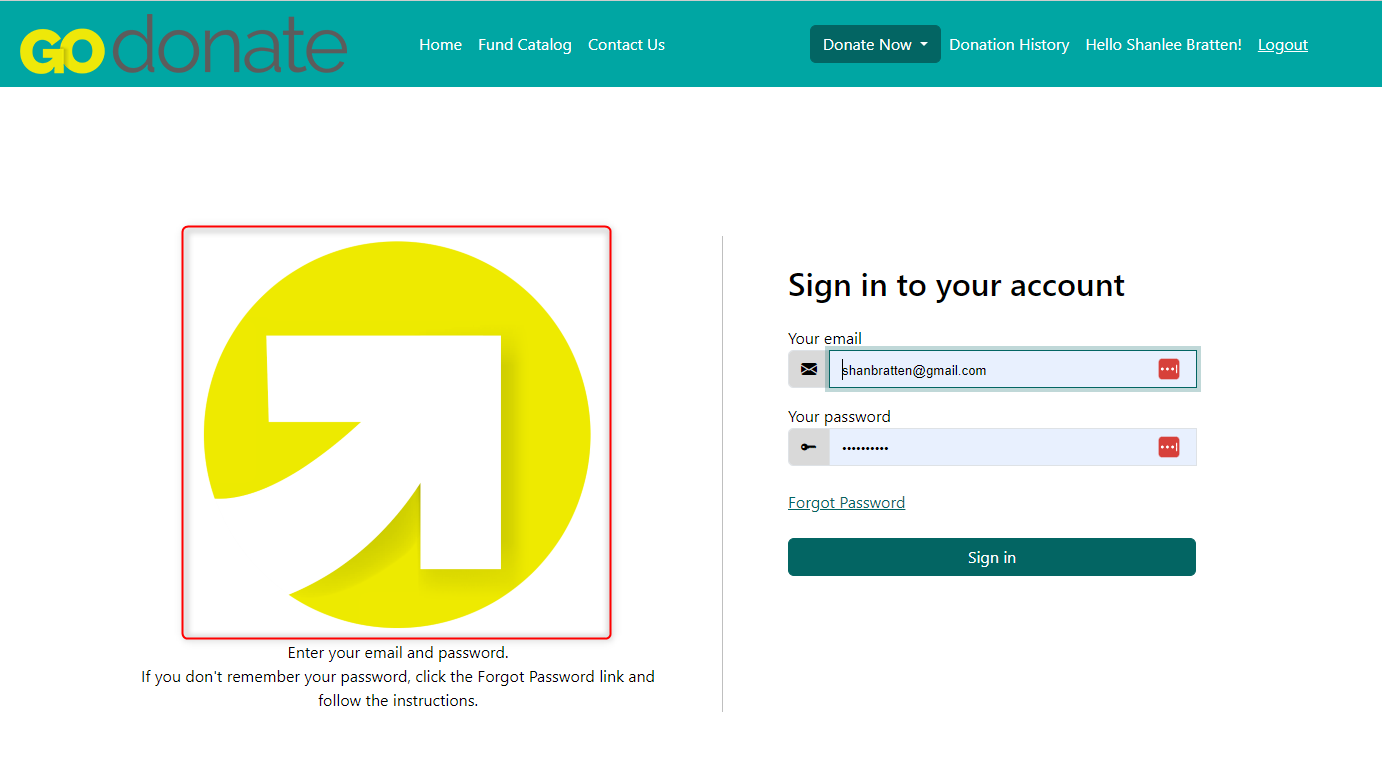
Sign In Instructions: Rich text editor. If sign-ins are enabled, this text will appear under your logo on the sign-in page, as shown below. Please note that images are not supported in rich text fields. Best practice is to type the sign-in instructions directly in this field. When copying/pasting from other apps, original formatting cannot be guaranteed.
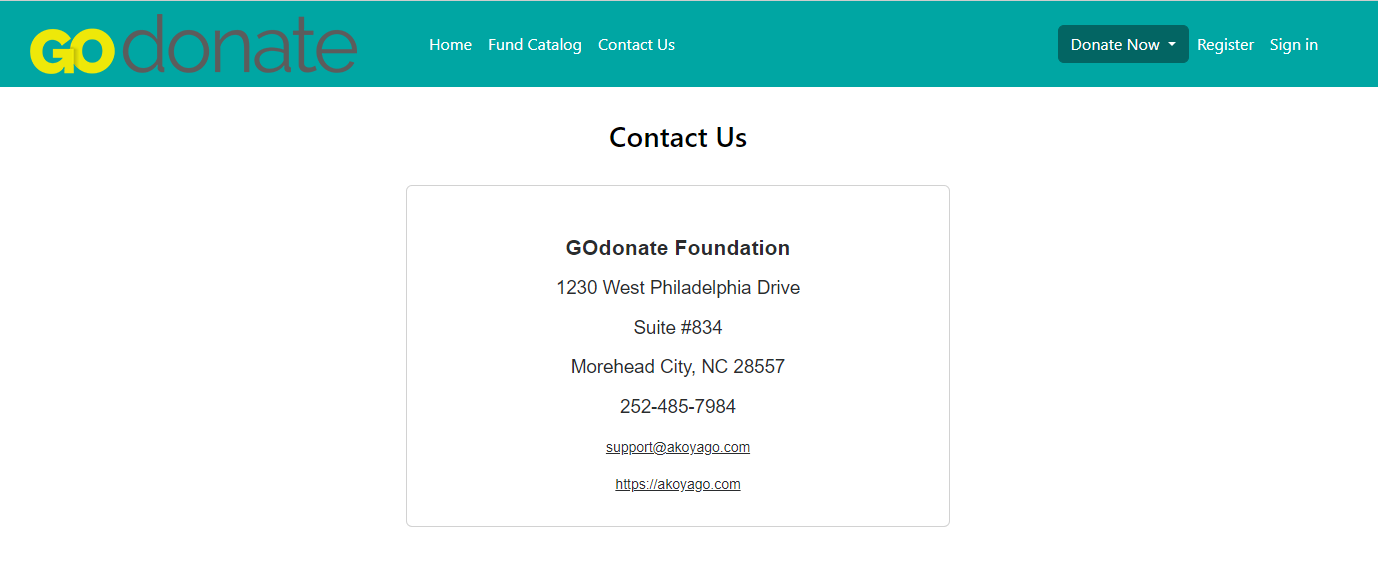
Contact Us Page Text: Rich text editor. Enter the contact information of the person/people that you want GOdonate users to contact with potential questions. This will appear in the Contact Us tab of GOdonate. Please note that images are not supported in rich text fields. Best practice is to type the text directly in this field. When copy/pasting from other apps, original formatting cannot be guaranteed.
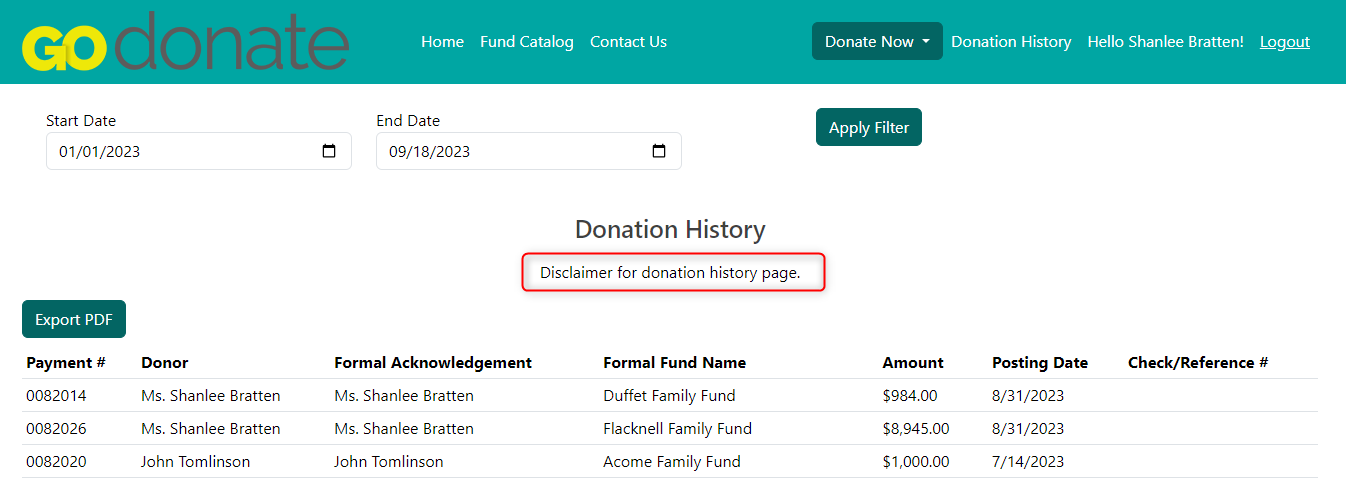
Donation History Disclaimer Text: Rich text editor. If sign ins are enabled, signed in users will be able to see their donation history. This is your opportunity to offer any disclaimers surrounding their donation history. Will appear at the top of the donation history page. Please note that images are not supported in rich text fields. Best practice is to type the text directly in this field. When copy/pasting from other apps, original formatting cannot be guaranteed.
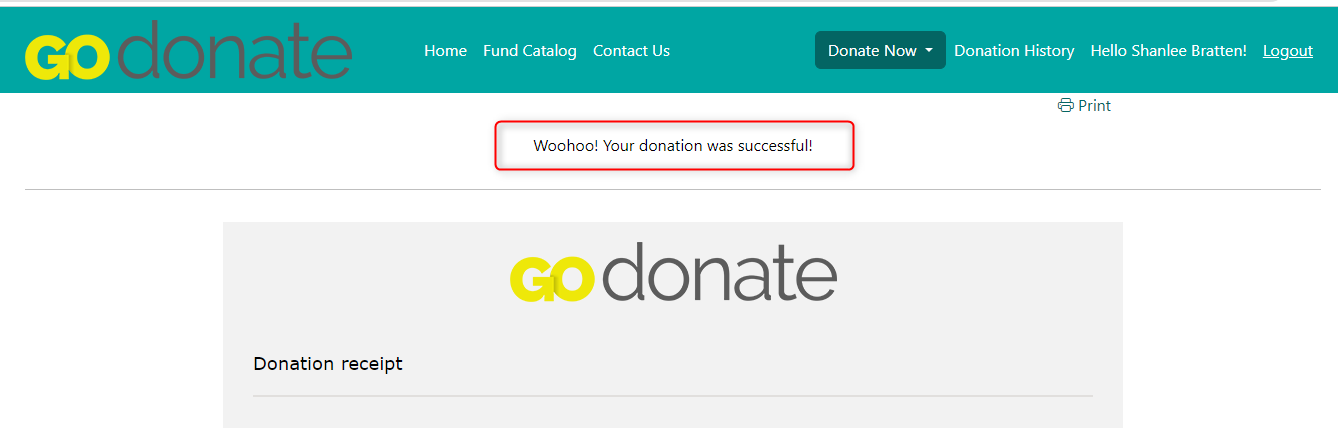
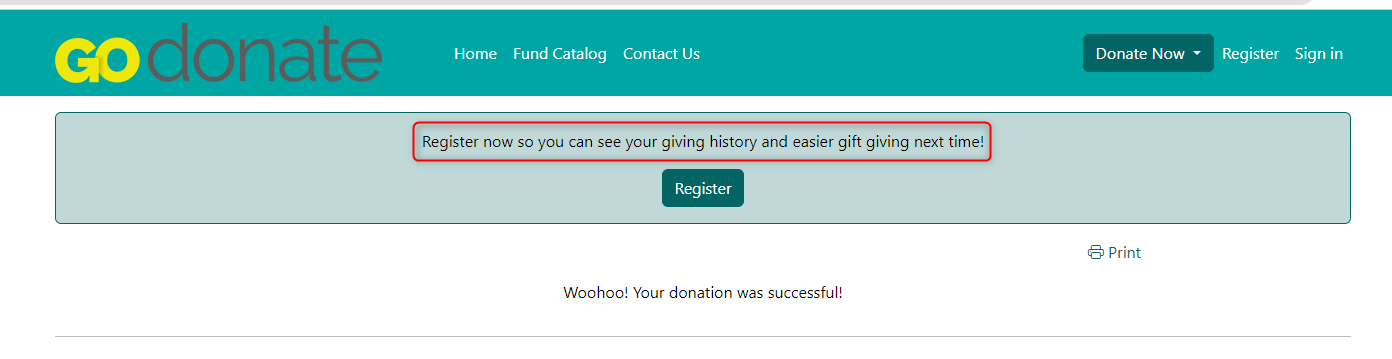
- Donation Confirmation Text: Rich text editor. Will appear above the donation receipt (donation receipt is driven by the GOdonate - Onscreen payment confirmation Email Template) after a donation is processed. Please note that images are not supported in rich text fields. Best practice is to type the text directly in this field. When copy/pasting from other apps, original formatting cannot be guaranteed.
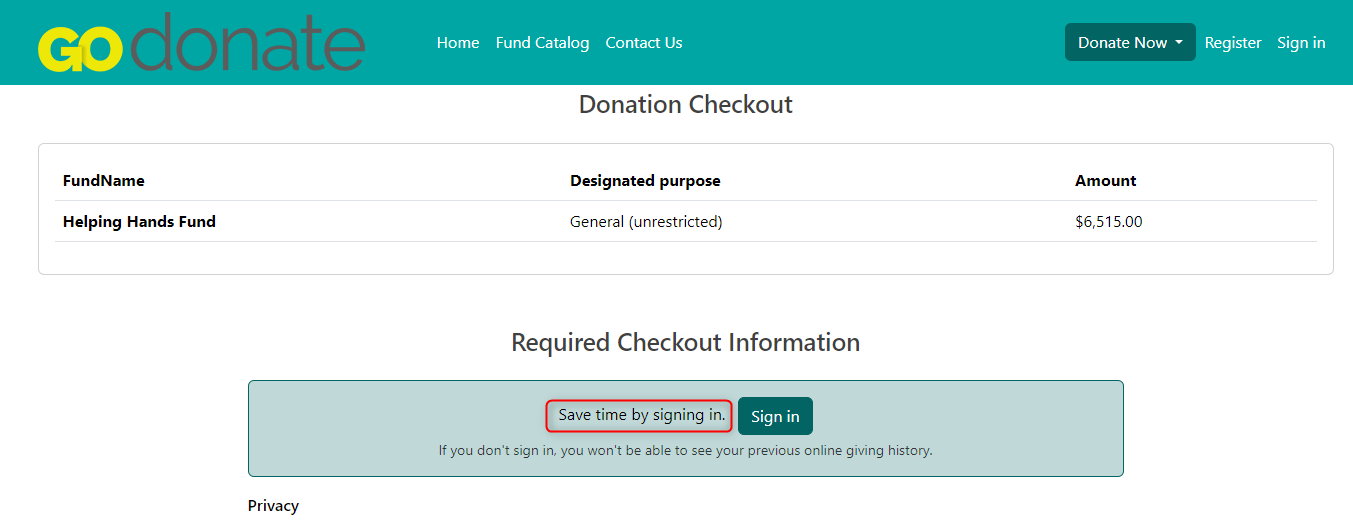
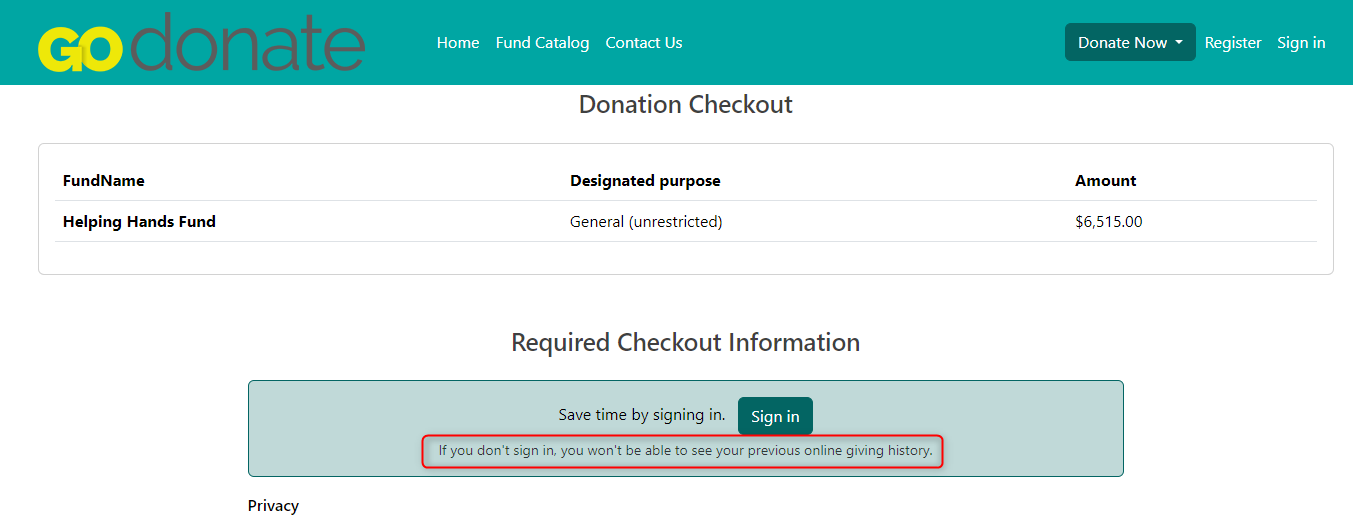
- Checkout Sign In Text: For non-signed in users, this site will recommend they sign in for a better experience. Here you can control the text, as shown below. Best practice is to type the text directly in this field. When copy/pasting from other apps, original formatting cannot be guaranteed.
Recurring Donations Disclaimer Text: For signed in users who have recurring donations, this appears at the top of the Recurring Donations page. Please note, if this is left empty, no disclaimer will appear at the top of the page. An example of text you may want to insert here would be something along the lines of: "We appreciate your ongoing support and dedication to the programs and projects that enrich our community. If you need to modify the fund(s) or amount given to each fund, you can make those changes below. To change the total amount of the recurring donation, please create a new gift."
Checkout Sign In Description Text: For non-signed in users, this site will recommend they sign in for a better experience. Here you can control the text, as shown below.
- Donation Receipt Register Text: For non-signed in users, this site will recommend they register an account for a better experience after their donation is processed. Here you can control the text, as shown below.
The Theme tab of GOdonate Settings is where you can upload the logo image and set the main colors for your GOdonate site.

Images
If empty, the image fields will default to an image that lists the maximum dimensions of the field.
- Primary Logo: will appear on the sign-in page, to the left of where users enter credentials.
- Homepage Hero Image: will appear across the top of the home page, behind your home page text. Recommended maximum image width is 1110px. If no hero image is uploaded, the banner will default to the background color.

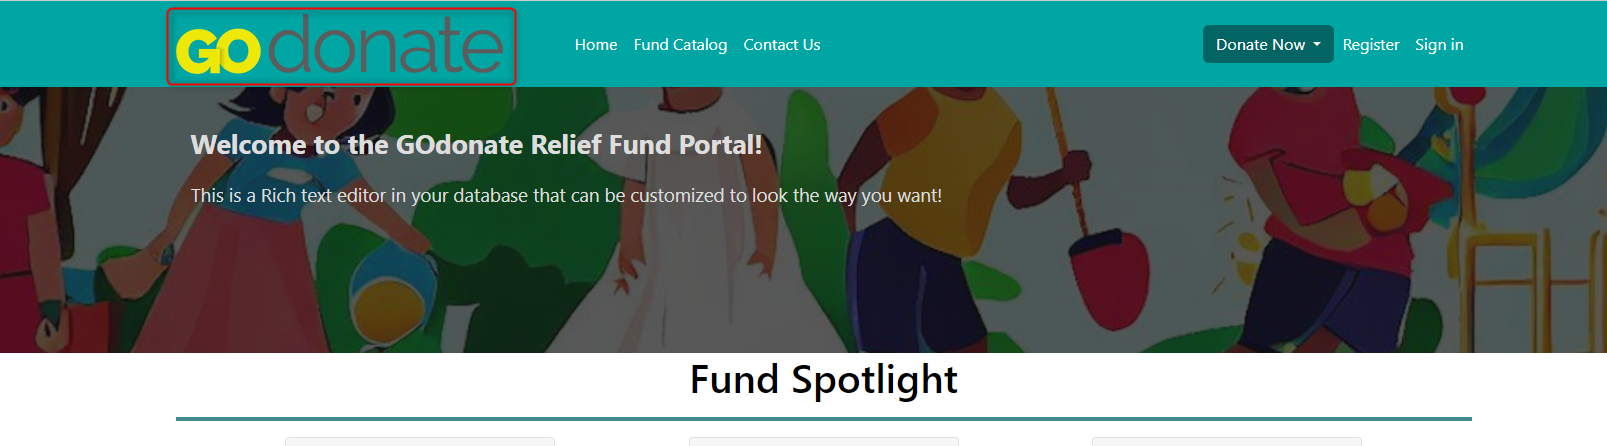
- Navbar Logo: will appear in the top left corner and will hold through each page of the site.
- Default Fund Image: upload an image file for fund cards of funds with no public fund image. If this field is empty, the fund card will default to a hard-coded image.
Colors
In the bottom half of the "Theme" tab, you have the ability to set custom colors to brand your GOdonate site.
Click the color box to select color. Use the Custom tab to enter HEX or RGB codes and control the transparency.
Primary Theme Color: The primary theme color is details and buttons on main pages of the site. For example, all Learn More buttons on fund cards, the Donate button, Sign in/Register buttons on the checkout page. Fund category/interest icons, and horizontal page breaks will be this color.
Secondary Theme Color: Not used currently.
Background Color: This will be the main background color on all pages between the header and footer.
Text Color: This is the color of any non-link text (excluding text in the nav bar, footer, and on buttons). For example, any custom text that you add to the site will be this color.
Link Color: The color of any links on the site (such as the email address on the Contact page.)
Navbar Color: The color of the upper navigation bar which includes the Home, All Funds, and Contact Us options as well as the Donate Now button.
Navbar Text Color: Any text found in the navigation bar will be this color. This includes the Home, All Funds, Contact Us, Donate Now, Register, and Sign in options.
Footer Color: Color of the footer at the bottom of the page
Footer Text Color: Color of any text included in the footer (Powered by akoyaGO text). This excludes links. Links in the footer will be the Link Color.
For example, if my color settings were as follows:
The GOdonate site would look like this:
GOdonate Flush the Cache of the Site for Theme/Text changes
When you update your GOdonate theme, you will need to flush your browser cache to see the changes immediately. You can do this in the browser, or follow the steps below to use GOdonate diagnostics.
Step 1: Open a new Tab with your GOdonate Site
Step 2: Modify the url to include "/diag" at the end of the URL. For example: https://godonate.akoyago.com/[your_tenant]/diag
Step 3: Once the site loads, it will take you to a diagnostics page for your Theme Settings for you to reset the site for everyone's theme. To do so, you will click the red button at the bottom of the page to “Flush Cache”. Once you do, you will revisit your GOdonate Site - https://godonate.akoyago.com/[your_tenant] - and observe your newest changes
GOdonate Settings: Fund Details
The fund details tab is where you can edit the details shown on each fund’s page when a user clicks Learn More.
Featured Funds on Home page
You can display three featured funds under the Fund Spotlight section of the home page. Fill in one, two, or all three if you wish. If you want to forego a fund spotlight, then leave these fields blank.

Fund Details Page
The Fund Detail page is what opens when a user clicks Learn More on a fund card and will look something like this:
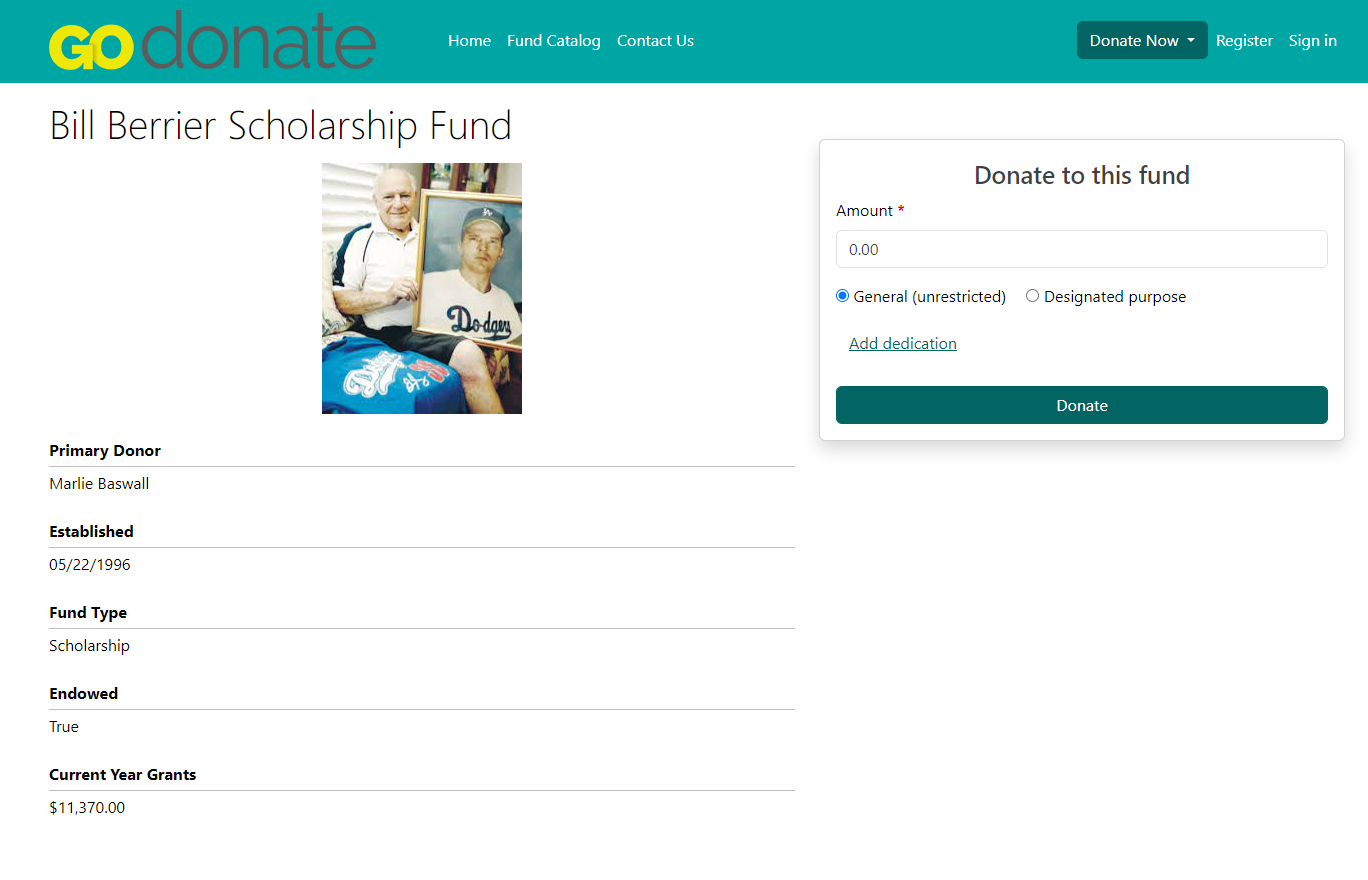
The fund details that you choose below will appear under the fund image.
You can customize which fields are included in the fund’s details page. The fields you choose will apply to all funds site-wide.

This section has three columns. From left to right, they are:
Options: the options are dropdown fields that contain all fields found in a Fund record (including custom fields). Select the field that you want to display. After selecting a field, the Label and Field name columns will auto populate. The order of the options in CRM will correspond with how the fields are displayed in GOdonate, meaning Fund Details Option 1 will be at the top and so on.
Label: you can change what GOdonate users see by editing what is in the label fields. For example, Purpose could say Fund Purpose, or Established could say Year Established. This is to make the fund details page make more sense to your users. This is optional; you don’t have to change the label.
Field name: these are the logical names of the fields selected in the Options column. These fields will be locked, and users will not see these names.
Workflow
GOdonate Transaction New Donor Creation: An on-demand workflow that can be ran to create a new donor record for non-signed in donations or donations where a signed in user chooses "Add a new donor". In the GOdonate Transaction record, drop down the Flows option and choose GOdonate Transaction New Donor Creation. This workflow will create a new donor out of the information that the user input during checkout.
Note: This workflow MUST be run before the transaction can complete processing.
Email Templates
There are four GOdonate email templates linked to core functionality, which you can customize as needed. To access them, go to Email Templates in the Tools area of akoyaGO CRM. For quick reference, use the GOdonate Email Templates view in the Email Templates table.
Please note: in the GOdonate email templates, the curly brackets { } signify a hard-coded field. You should not edit these fields.
The flat brackets [ ] signify fields that you can and should edit to your needs.
GOdonate Donation Confirmation Email: email that the donor gets after a successful transaction. Out of the box, this email will include the donor's name, the fund they gave to, and the amount they gave. If you want the fund to be included in the confirmation email, this is the email template that you must use.
GOdonate - Onscreen payment confirmation: not an email, but what is displayed to user after successful donation in UI under the Donation Confirmation Text that is set in GOdonate Settings.
To summarize, the Submission Confirmation page the GOdonate user sees includes text set in GOdonate Settings > Donation Confirmation Text field AND the GOdonate - Onscreen payment confirmation Email Template.
GOdonate Reset Password: email the user gets to reset their password
GOdonate Email Verification: This email is sent to newly registered GOdonate users. The user must confirm their email address by clicking the link in this email before logging into GOdonate for the first time.
If you have Enable Recurring Donations toggled on under your GOdonate settings, there are 3 additional GOdonate email templates you can customize.
GOdonate - Canceled/Expired Recurring Donation: Sends notification/confirmation to GOdonate user that their recurring donation has been canceled. This will send automatically when the user has chosen to cancel their donation via GOdonate UI, or if your organization has chosen to turn off recurring donations in GOdonate.
GOdonate - Notification of Status Reason Change: Sends a notification/confirmation to the GOdonate user that their recurring donation has been paused or experienced an error. This will send automatically when the user has chosen to pause their recurring donation via the GOdonate UI.
GOdonate - Recurring Donation Confirmation/Reminder: This is sent to GOdonate users who have set up recurring transactions (donations) via GOdonate. This email serves as a reminder that their upcoming recurring transaction will take place, and their card will be charged.